
To easily draw a dog, start by sketching a large oval for the body and a smaller circle for the head. Then, add shapes for the ears and legs, adjusting their positions for the breed. Next, refine the outline by detailing the muzzle, paws, and tail. Draw two ovals for the eyes, ensuring they're symmetrical, and add a small triangle for the nose. Don't forget to include eyebrows for expression and texture for fur. With practice, you'll improve your skills quickly. There's much more to explore to enhance your dog-drawing journey.
Key Takeaways
- Start by sketching an oval for the body and a smaller circle for the head to establish proportions.
- Break down the dog's features into basic shapes, like elongated shapes for ears and curved lines for legs.
- Refine your drawing by adding details such as the muzzle, paws, eyes, and nose for more character.
- Experiment with shading techniques like hatching and blending to create depth and texture in your drawing.
- Regularly practice and seek feedback from peers to improve your skills and develop your artistic style.
drawing pencils for beginners
As an affiliate, we earn on qualifying purchases.
As an affiliate, we earn on qualifying purchases.
Understanding the Drawing Process

When you start drawing a dog, it's essential to understand the drawing process. Begin step by step by creating a simple outline of the dog's shape. This outline serves as the foundation for your drawing.
Pay attention to proportions—break down the dog's body into basic shapes like circles and ovals to simplify the task. Next, add key features such as the eyes, ears, and nose to give your dog character and personality.
Once you have the basic structure, incorporate shading and texturing techniques to enhance realism and depth. Regular practice and experimentation with different styles will lead to significant improvement in your skills over time.
Embrace the process, and don't be afraid to make mistakes!
colored pencils for sketching
As an affiliate, we earn on qualifying purchases.
As an affiliate, we earn on qualifying purchases.
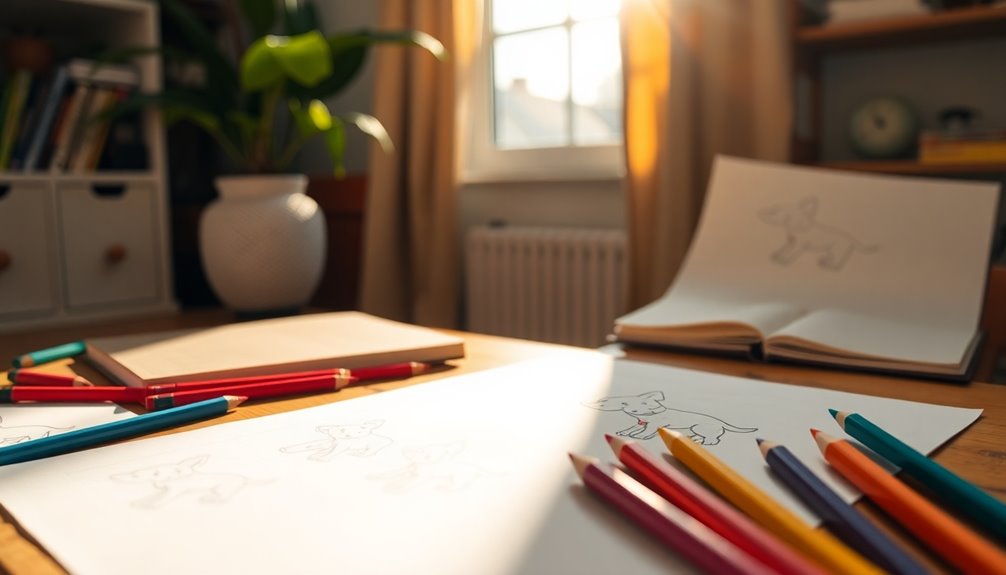
Essential Drawing Materials

Having a solid understanding of the drawing process sets the stage for choosing the right materials. As a beginner, all you really need is a simple pencil and paper to practice basic shapes and outlines.
An eraser is essential for correcting mistakes and refining your sketches, while a sharpener keeps your pencil sharp for detailed work. If you want to experiment, consider adding colored pencils or markers to enhance your drawings.
Remember, a clean and organized workspace helps you focus without distractions. For those leaning towards digital art, a tablet and stylus can be a versatile alternative, offering easy editing and access to a wide range of colors.
Choose what works best for you, and enjoy the journey of drawing!
art eraser and sharpener set
As an affiliate, we earn on qualifying purchases.
As an affiliate, we earn on qualifying purchases.
Step-by-Step Dog Outline

To create a solid foundation for your dog drawing, start with a few simple shapes. Follow these steps to outline your dog:
- Sketch an oval for the body and a smaller circle for the head to establish proportions.
- Add two elongated shapes on top of the head for the ears, adjusting their position based on the breed you're drawing.
- Draw four slightly curved lines extending from the body for the legs to give a natural stance.
- Outline the tail with a curved line, modifying its length and position based on the dog's breed and posture.
Once you've completed the basic outline, refine the shapes by adding details like the muzzle and paws before moving on to facial features.
digital drawing tablet with stylus
As an affiliate, we earn on qualifying purchases.
As an affiliate, we earn on qualifying purchases.
Adding Facial Features

As you focus on adding facial features, remember that these details can greatly enhance your dog drawing's personality.
Start by sketching two ovals for the eyes, positioning them symmetrically for a balanced look. Next, add a small triangle or oval shape at the center of the face for the nose, making it slightly wider at the base for a natural touch.
For the ears, create two elongated shapes that can be either floppy or pointy, depending on the breed. Incorporate curved lines above the eyes for eyebrows to enhance expression.
Finally, detail the pupils, add highlights in the eyes, and sketch some fur texture around the face to bring your drawing to life.
Detailing the Body and Tail

Now that you've added facial features, it's time to focus on the dog's body and tail.
Start by sketching the basic shapes to get the proportions right, then refine the lines to highlight muscle definition and curves.
Don't forget to position the tail naturally, reflecting the dog's movement and breed characteristics for a more lifelike appearance.
Body Proportions and Shape
Creating a well-proportioned dog starts with the body shape, which should be represented by a simple oval that matches the size of the head. To guarantee your drawing looks natural, follow these steps:
- Sketch the body as an oval, dividing it into sections: the front half for the chest and shoulders, and the hind half for the hips and back legs.
- Position the legs directly under the body for a standing dog, or tuck the hind legs in for a sitting pose.
- Use gentle, rounded lines to draw the contours of the body, enhancing its softness.
- For the tail, create a curved line extending from the back, reflecting the breed's characteristics.
These techniques will help you capture a well-proportioned dog.
Tail Position and Movement
With the body shape established, focusing on the tail's position and movement adds personality to your dog drawing. The tail's position can indicate a dog's mood: a high, wagging tail shows happiness, while a low or tucked tail suggests fear. When drawing, consider the breed's specific tail characteristics—some have long, flowing tails, while others are short and stubby. Use curved lines to depict movement, emphasizing the wagging direction. Add texture by varying stroke length to represent fur.
| Tail Position | Mood Indicated | Breed Characteristics |
|---|---|---|
| High and Wagging | Happy and Excited | Long, fluffy tails |
| Low and Tucked | Fear or Submission | Short, stubby tails |
| Neutral | Calm or Relaxed | Varies by breed |
| Straight | Alert | Varies by breed |
| Curved | Playful | Varies by breed |
Techniques for Shading

When shading your dog drawing, pay attention to the light source to determine where shadows should fall.
Experiment with different techniques, like blending for smooth textures or cross-hatching for detail.
These methods will elevate your artwork, giving it a more lifelike appearance.
Types of Shading Techniques
Shading techniques can greatly enhance your dog drawings, adding depth and realism. Here are four effective techniques to contemplate:
- Hatching: Draw closely spaced parallel lines to create shading, varying thickness for different effects.
- Cross-hatching: Layer intersecting lines to deepen texture and complexity in your shading.
- Stippling: Use small dots to create shading, adjusting dot density for darker or lighter areas.
- Blending: Smooth pencil strokes with a blending stump or your finger for a soft gradient effect.
Experimenting with these techniques will elevate your artwork, making your dog drawings more lifelike and engaging.
Light Source Considerations
Understanding the light source is essential for creating realistic dog drawings, as it defines where highlights and shadows will fall on your subject. Start by identifying the light source in your drawing, which helps you determine where to shade.
Use softer pencils like 2B or 4B for areas further from the light, allowing for a smooth shift between light and dark. Focus on regions under the ears, belly, and tail, where shadows naturally occur due to the dog's structure.
Employ cross-hatching or stippling techniques to add texture and depth, mimicking the fur's appearance. Don't forget to leave some areas white or lightly shaded to illustrate highlights, enhancing the overall realism of your drawing.
Blending for Smoothness
Blending for smoothness is essential in achieving lifelike dog drawings, and there are several effective techniques to master.
Here's how you can enhance your shading skills:
- Use a soft pencil (2B or 4B) for darker areas and a harder pencil (like HB) for lighter sections to create a gradient.
- Employ a blending stump or tortillon to smudge pencil marks, softening harsh lines for seamless shifts.
- Layer your shading by starting with light pressure and gradually building up darker tones; let each layer dry slightly before adding more.
- Observe how light interacts with the dog's fur and replicate that texture by varying stroke lengths and directions.
These techniques will help you create depth and realism in your drawings.
Practicing Your Skills

To improve your drawing skills, commit to practicing regularly, even if it's just 15-30 minutes each day. This consistency helps develop muscle memory, making it easier to capture shapes and proportions.
Study different dog breeds to understand their unique features, which will enhance your accuracy. Using reference images is essential; they allow you to notice details that might escape your eye otherwise.
Don't hesitate to experiment with various drawing styles, like cartoon or realistic, to find what resonates with you.
Finally, seek feedback from peers or online art communities. Constructive criticism not only boosts your confidence but also fosters your growth as an artist, pushing you to improve your skills continuously.
Keep practicing, and you'll see progress!
Building a Creative Community

As you immerse yourself in the world of drawing, connecting with a creative community can truly elevate your artistic journey.
Here's how you can benefit:
- Valuable Feedback: Get insights from fellow artists to improve your skills.
- Inspiration: Discover new ideas and styles that spark your creativity.
- Local Connections: Join art groups or classes for face-to-face interactions and collaborations.
- Drawing Challenges: Participate in prompts to push your boundaries and explore new techniques.
Utilizing online platforms like social media and art forums lets you share your work and engage in discussions.
Building a network of fellow artists will enhance your learning experience and could lead to exciting collaborations. Engaging in creative play with others can also stimulate cognitive growth and inspire innovative approaches to your art.
Embrace this opportunity, and watch your artistic journey flourish!
Frequently Asked Questions
How to Draw an Easy Dog Step by Step?
To draw an easy dog step by step, start with a simple oval for the body and a circle for the head.
Next, sketch basic shapes for the eyes, ears, and nose. Define the legs and tail while keeping everything proportional.
Lightly shade areas like the ears and underbelly to add depth.
Finally, refine your outlines and add any patterns or colors you like, giving your dog a personal touch.
How Do You Draw a Dog's Basic Shapes?
To draw a dog's basic shapes, you'll want to start with something simple yet enchanting.
Begin with a large oval for the body, then add a smaller circle for the head; this sets the stage.
Next, place a smaller oval or rectangle below for the legs, using circles for paws.
Don't forget those triangular ears!
Finally, sketch a snout with a tiny circle for the nose.
You're building a canine masterpiece!
How Do You Draw a Juicy Dog?
To draw a juicy dog, start by sketching a big oval for the body and a smaller circle for the head, keeping them proportionate.
Add rounded shapes for the legs and tail, using thicker lines to emphasize plumpness. Create large, expressive eyes and a wide, happy mouth to enhance its cheerful character.
Shade around the belly and legs for depth, then finish with bright colors and glossy highlights to make your dog truly pop!
Where Do You Start When Drawing a Dog?
When you start drawing a dog, it's like laying the foundation for a house—you need a solid base.
Begin by sketching simple shapes, like ovals and circles, to outline the dog's body. Focus on the head first, positioning its features with guidelines for accuracy.
As you refine your sketch, pay attention to the legs, tail, and breed-specific characteristics. This process helps capture the essence of your furry friend before adding details.
Conclusion
Now that you've learned how to draw a dog, it's time to put your skills to the test! Did you know that nearly 60% of American households own at least one dog? That means there are plenty of furry friends to inspire your art. So grab your materials, keep practicing, and don't hesitate to share your creations with others. Remember, the more you draw, the better you'll get—so enjoy the journey and have fun!